I once had this as a tutorial, and as people are always making drifting projects I threw this together and recently added more. It's not a tutorial, but a guide, so I think it belongs here. It is not the drifting bible, its a guide, not guidelines. This is a compilation of experience, guides, tutorials, and theories that are used to create the "perfect" drifter.
The Steps to Creating a Drifter
or just a list of things to touch on
Do it and like it. If you don't try it, you won't know
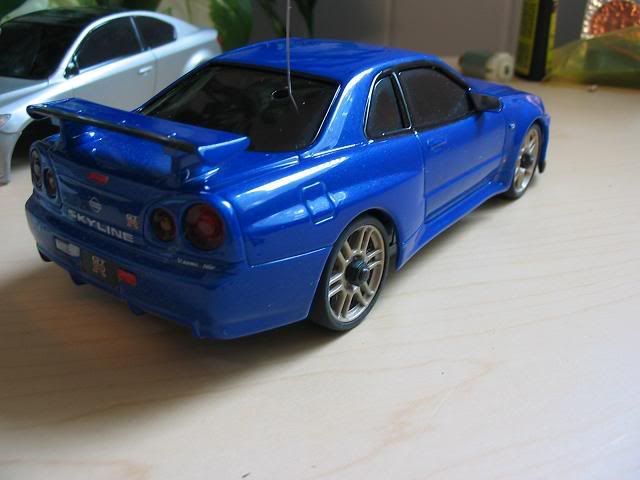
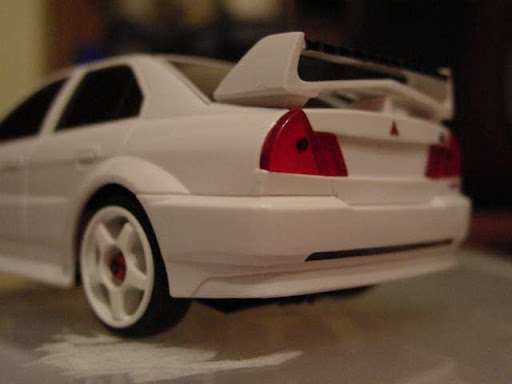
Generation 1 Cars work best in general because of their better weight distribution.
Quote:
Originally Posted by XMDrifter

BIIIG space = lithium
tight technical tracks with more turns = NiMH
and lithium is not neccesary to drift well. it's more about driver than the car.
|
Step 1 to a drifter:
Speed off the line is essential. So high power Ni-Mh, or high mAh lithium is recommended.
Lithium can be really sloppy if not used correctly, more space=lithium, less=ni-mh.
With your first drifter, go Ni-MH
I recommend the lithium packs from
www.Atomicmods.com as they are professionally made. OR make your own pack, this increases life since the lithium packs can sit on shelves for a while.
If you are going to run Ebay lithium, excluding Jaw Drop Racing, you should probably be aware that they are of low quality. If you are going to use these cells, you should rewire them, as the wire used is worse than stock xmod wire.
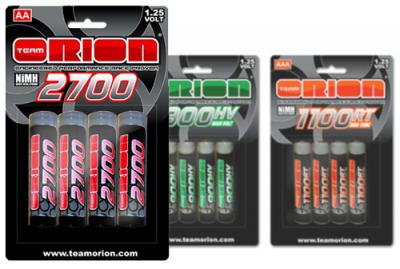
Ni-Mh
-Orions off of Atomicmods are probably your best bet with an Ni-Mh Battery
Positives:Medium Amperage, professional, long lasting, Lots of choice when it comes to mAh
Negatives: Less power than Lithium, may have to upgrade motor for increased speed
 Alkaline
Positives: Decent Amps, low COG
Negatives: Expensive, heavy, Short long Times
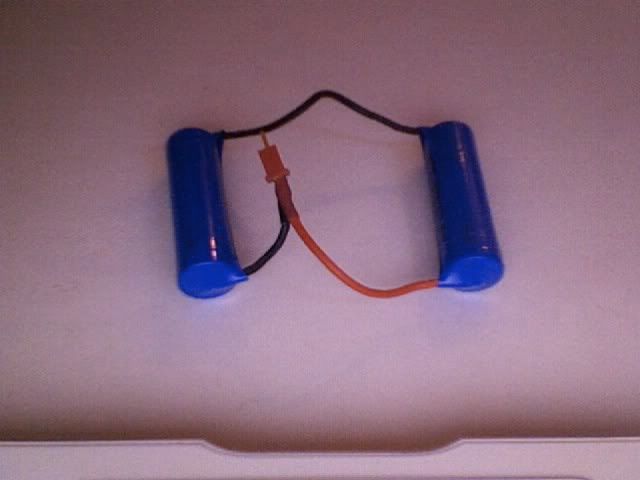
Lithium Ion (including sqaure Evo kits)
Positives: High Amperage, Generally light weight, Long run times
Negatives: Can be dangerous, expensive (rechargeable though)
http://www.bayvillemodders.com/apps/...ts/show/226815 -- Evo squares
http://www.bayvillemodders.com/apps/...ts/show/226819 -- Generation 1 Cylindrical
Gen1 Cylindrical:
Evo Squares:
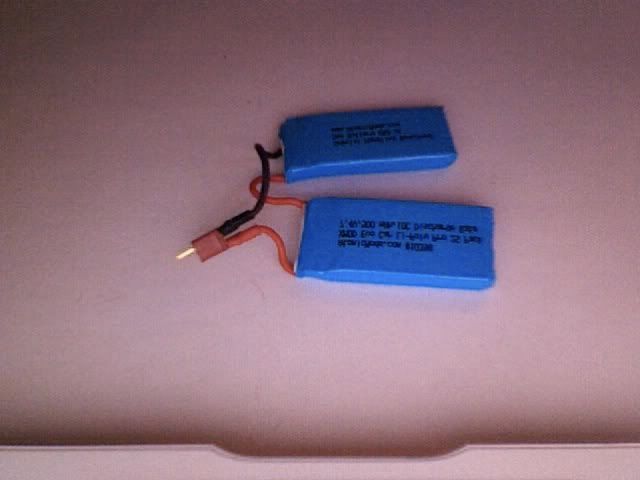
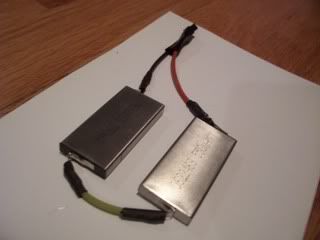 Lithium Polymer
Positives: Highest Amperage, Lightweight
Negatives: Throws off Center of Gravity unless chassis lowered properly
http://www.atomicmods.com/Products/X...ck__10398.aspx -- 2S Kit
http://www.atomicmods.com/Products/X...ck__10399.aspx -- 2S2P Kit
2S2P kit:

2S Kit:
 mAh Ratings
The higher mAh the longer run times, but less power is put out.
Ni-Mh has best selection, refer to this link for basically all in production Ni-Mh battery mAh.
http://www.atomicmods.com/Categories...Batteries.aspx
Lithium Ion usually ranges from 550-850 depending.
Lithium Polymer are usually around 350-450.
My lithium ion squares are 550 mAh, so high output.
Tutorial for Generation 1 Lithium
http://www.atomicmods.com/Categories...tallation.aspx
Tutorial for Evolution Lithium
http://www.atomicmods.com/Categories...tallation.aspx
Step 2:
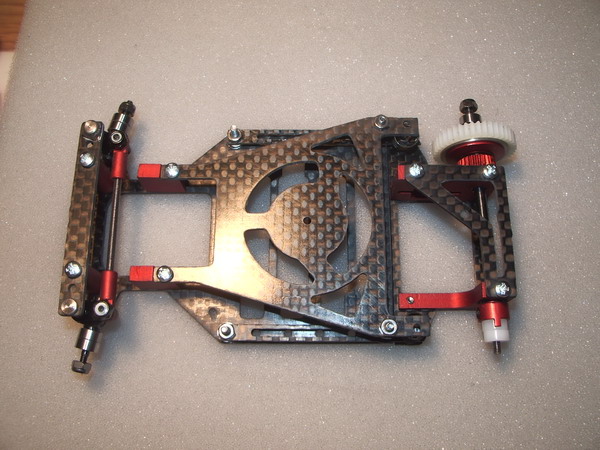
AWD, All wheel drive is essential, when it comes to xmods. Many people are mistaken when they think FWD or RWD is better for drifting. RWD Xmods just do tailspins, not drifting, sorry guys. Instead of using the red differential gears in the front(bearing differential), use another white differential (gear differential), because the red differential is just garbage, slips and quickly becomes useless.
As for Evos, I recommend composite gears, as they don't grind and wear under the stress of drifting.
Composite Gears and Link:
http://www.atomicmods.com/Products/A...ar__13086.aspx

Optional Step 2a: Locking both or front differentials helps keeps the car in continuous drift, making it easier to sustain a long linked drift.
Search for tuts, I don't feel like it right now

Step 3:
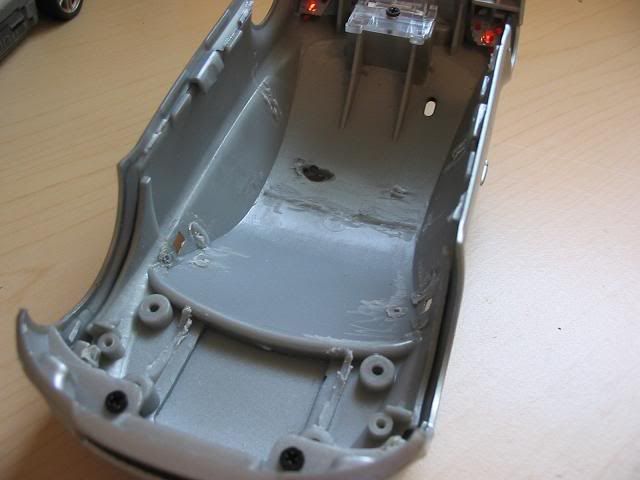
Trim the front knuckles if you have a generation 1. You want the front to run extremely smoothly, almost as if the distribution is 55% front 45% rear.
Tutorial to trim the front knuckles
http://www.atomicmods.com/Categories...-Trimming.aspx
Tie rod degree plays a huge role in any type of drifting.
The negatives and easiest to drift with as the are understeer and provoke slip.
As you get more experienced you can experiment with different degrees, I drift with -2 degree rods.
Negative= Oversteer
Positive= Understeer
It is the same thing as real cars, you want a negative angle created so the tail kicks out.
Editing your camber/caster:
Use these two quotes from Color0's drifting bible. By using the information from the first quote, and applying it to the tutorial, you have a much more effective drifter.
The little things, even a degree, make a difference
Quote:
|
Camber: Generally, more camber increases cornering traction and decreases forward traction to those tires adjusted. (The range of useful camber adjustments is about between 0 and 4 degrees.) If you run plastic tires on a hard surface, this doesnt really matter to you. On soft surfaces like RCP, a little negative camber is useful to prevent the outside edges of the tires to hook into the surface material and cause handling inconsistencies. On hard surfaces, how much camber depends on how much your chassis rolls. Typically 1 or 2 degrees will be enough, since were drifting and its not that fast. But adjust front and rear camber to change your front/rear traction balance to your likings.
|
Quote:
this is comprehensive for both gen 1 and evo, and i have diagrams for both. however, it is more than likely a one-time mod, meaning the settings are permanent. before and after pictures will be added soon.
tools/materials required:
exacto knife
superglue
toothpick
for evo:
the front and rear rely on the same suspension concept, so the following instructions work for both ends of the car.
1. here's the top view of our evo around the front left knuckle area.

2. to increase negative camber, we move the hole some distance towards the centerline of the car. to increase caster, move the hole back. each 0.25mm corresponds almost exactly to 1 degree of negative camber or caster (depending on which direction you move the hole). this diagram, and the following depict a camber change only.

3. take an exacto knife, and scrape away at the inside edge of the hole until you reach 0.25 or 0.5mm or however much you want the knuckle to move in (remember, 0.25mm = -1 degree camber/caster). now the hole should be elongated into an oval.

4. the red circle denotes our final hole; to achieve it, we have to fill in part of the original hole with superglue. the space between the black semicircle and the red circle is where the superglue should be applied. use a toothpick and small dabs, allowing the surface tension of the superglue to do its work.

5. when the superglue dries, it should leave a circular opening that is some distance offset from where our original hole was. the superglue should not need sanding in most cases, as most formulas dry smooth. if you applied too much, a strip of sandpaper looped through the hole can help you sand away the excess. sand until your knuckle fits snugly (but easily) through. the red hole is the final result of our modding.

as stated before, the process is identical for the rear, except that the rear suspension can only take increased camber (caster, or anti-squat, in the rear will bind up the suspension).
for gen 1:
for the front, the process is the same, except that the hole should be moved outwards and forwards to increase camber and caster respectively. thus:

note that offsetting the hole more than 0.5mm (~2 degrees) will weaken the chassis.
when finished, the final hole is offset outwards instead of inwards.

for the rear, the suspension arms should be shimmed so that the suspension arm sits at the correct angle when the car is at rest. arrow points to the required shim. when making this shim you should start off thick, glue it to the chassis, and sand off until you reach the desired amount of camber. note that this will affect your ride height slightly depending on how much negative camber you end up with.

pictures:
note the slight positive camber in the evo (highly undesirable; i believe it's the wheel's fault) vs. the negative camber in the gen 1:
the gen 1 rear camber fix; the shim is very thin, on the order of 0.25-0.5mm:
|
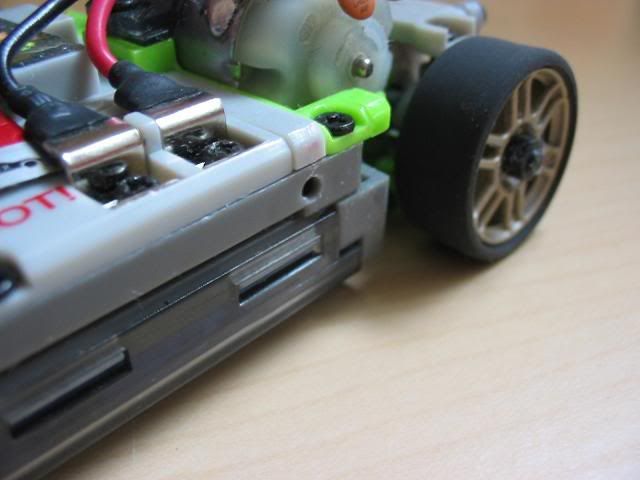
Step 4: The motor plays a large role in drifting. Using a Stage 2 isn't so smart, but anything more powerful is retarded. I use a stage 1 and white pinion because there is greater torque and less rpms. Starting a drift immediately really is a good opening to any line of drifting
Neodymium magnets increase potential torque, and Hybrid motors work great too.
Lower gear count is more torque.
For Ni-Mh you may want to upgrade to a lower turn (non FET safe), but keep high acceleration.
EXPERIMENT
Step 5: Move the battery pack as far forward as possible, less weight in the back makes it easier for the rear to slip.
Evos, unscrew the bottom and slide forward.
Generation one isn't that complicated, and doesn't matter. The distribution is much better on Gen 1s.
Step 6: If you are using a generation 1 install a tight turns upgrade so you can perform much tighter drifts and link them easier. If you are running an Evolution, don't worry about it.
Aluminum Tie Rods reduce slop, and make things much easier.
For Generation 1 Stock Tie Rods, you can follow aquaman's tutorial to lock the tierod in place.
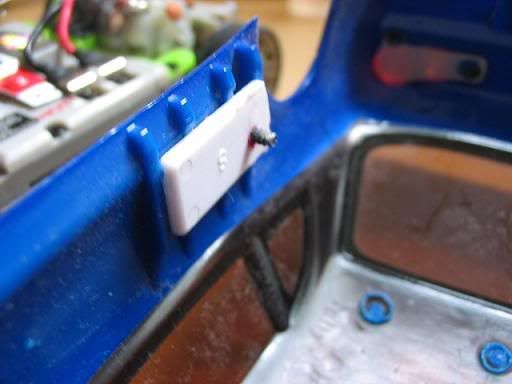
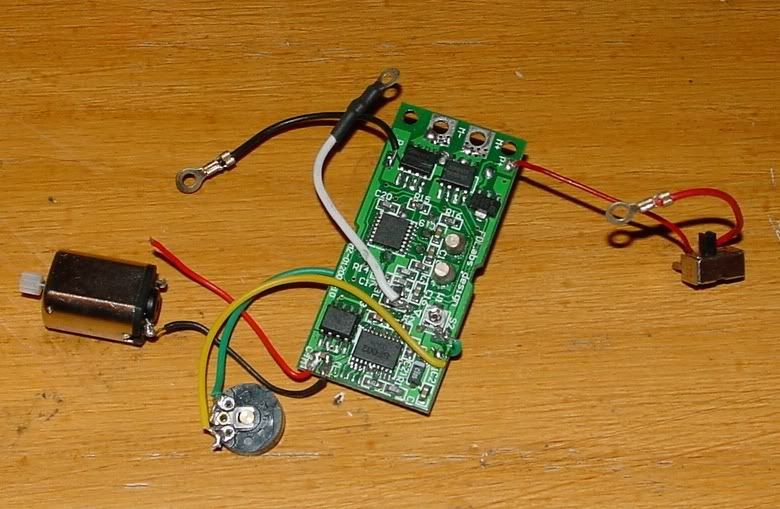
Step 7 (Optional): Make all your car directly soldered or deans plugged. This allows more power and quick response from the car.
Step 8: Suspension, the most disputed part of this guide. You want a more sensitive set in front then in rear. I use blue in front and red in the rear, total opposite of what my track car is.
Submit your suspension set ups here. Post em on this thread.
Yellow all around
Blue in front, red in rear.
Strut Bars are a great addition to your generation 1. They angle both rims/tires at the same angle, creating equal slip.
Step 9: Experiment with extending your chassis, and see if you like short, medium or long.
Step 10: Tires.
Lithium can wear tires down quick, and I reccomend hard tread, or soft tread and wear them in as you drift.
NiMH, stick to the non treads. The drifting kit from RS isn't very conductive for drifting, so don't use it.
Another option for tires is using pvc pipe tires. You get the right size to fit and they are much more even than the drift kit and work well. You have to glue them on.
Quote:
|
You can go softer (i.e. electrical tape, hard rubber) when you feel the need for faster corners and bigger challenges. Scotch tape has less grip than electrical tape, btw. But when you first start out, use plastic tires; everything slows down and you get more time to work on solidifying your technique. Since we're running AWD, there's no need to have different tires front and back, we can just keep them all the same.
|
It works like this, less grip, more slide and vice versa. You have to tune to the potential of your own car.
Step 11: Bearings.
They smooth everything out. Just get them. No questions.
READ THIS, It covers things that I have not touched on, and just makes you more aware of your platform.
Read this, it helps your relative idea of what you should be doing.
Quote:
Originally Posted by XMDrifter
Xmods are very nice little cars. However, they do not compare with any type of competitive rc's because of their instability and inferior handling. Sure, xmods are very fast, but that is kind of worthless when it comes to racing on technical tracks and such. To be competitive, xmods must be carefully adjusted and modified. You can't just slap any upgrades on your xmod and call it a track car. Choosing the right setup is crucial.
So we begin:
1. Weight:
a. Total weight: A cars tires can only provide so much grip. When the inertia of the car overcomes the available grip of the car, most of the time, the car becomes unstable. To eliminate excess weight, you have to look at the car and see what is not necessary for the car to run smoothly. An example would be your rear bodyclips. Another would be all the screws (there are so many doing the exact same job.) Just think of what would not be necessary and is not a critical part.
Try not to remove things from the bottom of the car. Why?
Because that would make the center of gravity rise higher and impact the handling of the car.
b. Center of gravity: the point at which the car is balanced and can be moved in any orientation and it will just stay there. With track cars, the lower this is, the better the car will handle. The front/rear weight bias also heavily affects handling (especially at this tiny wheelbase). When trying to find the right distribution of weight, it's just trial and error.
If your car:
-understeers too much, move the battery tray forward to push weight over the front tires
-oversteers too much, move battery tray back to push weight over the rear tires
-flips, try to widen the car's "footprint" by using wider tires and wheels and lower the center of gravity. (wings also help somewhat). Another solution is to shave the interior of the car body and eliminate screws, excess plastic, etc. This takes away weight from the top of the car, so its center of gravity lowers dramatically.
(one blaring source of excess plastic is the rear bodyclip. you can actually remove this and try the body mounting method shown below)
(BTW the credit for these pics goes to Kel who can drive a rwd xmod fast on a track)
Lithium batteries often will increase the flip-risk.
2. Suspension and Steering:
a. The springs and dampers: These are very important parts of the cars handling. RadioShacks springs are very stiff. The only ones that are practical for use with the xmod cars are the red ones. The others are just too stiff. The dampers are nice, but there are little burrs on them that catch on the springs when they compress, causing inconsistencies in the suspension. Shave these burrs off. There is no need for them even though people claim they hold the springs on. 
b. Damper positioning: Beleive it or not, the damper position affects handling. straight from mini-z racer forums:
anyways, point here is that the suspension will have better damping/controled movement, better traction, the suspension will compress easily at first and then become stiffer, and driving errors can be corrected much more easily IF you "lay down the shock".
b. Wheel wobble: one of the serious weaknesses to an xmod. The only real fix is to upgrade to open bearings (sealed bearings only if you use the open knuckle GPM). The open bearings have less resistance because theres no shield to rub against both races of the bearing. The bearings eliminate about 80-90 percent of the wheel slop, allowing the car to be more precise and consistent. If you want absolutely no wobble, add the aluminum axle stubs. This will stop the wobble and what wobble is left would not have any effect. If your wheels themselves have wobble, then you should use aluminum lock nuts to hold them tighter to the axle stubs, or you can try the mod that is on this forum somewhere (I think you use some sort of glue and put it in the center D-hole and place the wheel on a spare driveshaft. When it dries its supposed to be able to be slipped right off). The stock nuts dont hold very well, and dont keep the wheels from shifting side to side. Id go ridgeless here because aftermarket wheels have less slop.
c. Steering slop: the stock tie rod and the upgrade tie rods all are very sloppy. Upgrade to aluminum if as soon as you can. The alloy tie rod will help the cars steering track straight and not drift to either side. Along with that, the slop within the servo gears can be remedied by using light gear grease or silicone grease on them. The slop will be mostly gone by the time you finish this modification.
3. Tires: not much to say here. Narrower tires allow sharper cornering while wider tires provide more grip. Theres a point when wider becomes worse. Thats when your car has trouble negotiating turns effectively and understeers like crazy (thats if both front and rear tires are of the same softness). Tires increase in hardness as the tire degree goes up, so for example, a 15 degree tire is softer than a 25 degree tire. The front tires should not be wider than the rear tires.
IMPORTANT NOTE: RadioShacks tires are not flat and true. It is best if you shave off the ridge on the wheel, mount the tire by tire-tape, and true the tire surface. Why do flat tires matter? Because it can then have a larger contact patch and will be more consistent on a track.
The best thing to do though, is to upgrade to ridgeless and use mini-z tires.
6. Electronics:
a. Xmods electronics: Low control, no modification, glitching common, and remote is not very good
 b. Mini-z electronics:
 the best, precise control, slight modification, very little glitching, available in 2.4 gHz ASF. Strong transmitter and fets
 c. Iwaver/Firelap electronics:
 big improvement over xmods electronics, but less powerful than mini-z electronics. Equal precision and modification. Good transmitter and xmod quality fets. Slight glitching when distance becomes great.
 d. Radline electronics:
 great, but not easy to fit.
e. Modular hobby grade electronics: very hard to fit into the chassis, heavy, very precise and no glitching. Strong transmitter
8. Aerodynamics:
a. Aerodynamics affects these cars when they travel above 10 mph. The air molecules are a bit larger in comparison to xmods, so aerodynamics has less effect than in a full size car, but it still works.
b. Wings: these help keep the car from becoming squirrely in corners, and helps keep the rear in check. Use lexan or thin plastic wings.
 c. Bodies:
 certain bodies are more aerodynamic than others. Mini-z bodies are more aerodynamic than xmod bodies. They are thinner, lighter, and are smoother. They can be mounted by drilling a small hole in the side of the stock chassis and taking off the clips that mini-z bodies have on them. There will be a stile screw that can just pop into the little hole that was drilled in the side of the chassis. This eliminates the bulky and heavy rear clip, and allows more variety of bodies to be mounted.
d. Taking off mirrors and having a lower body can help improve the aerodynamic properties of the bodyshell.
e. Lexan bodies are very aerodynamic as well as durable and light. They remove weight from the top, so they are great for improving handling, and the paint wont scratch because you paint it from the inside.
 9. Chassis
a. The stock chassis: reasonable rigidity. Slightly heavy, low CG. variable handling adjustment
 b. Stiletto and similar chassis:
 light, relatively low CG but higher than stock, rigid. Handling varies by parts installed
 c. DIYmod type chassis:
 high CG, flexible, durable, for scale appearance, loose handling, light
d. SLRC and similar: light lower CG, rigid. Neutral handling with slight adjustment
e. MRCG: RWD only. Light. Lowest CG, rigid. Neutral handling with adjustment

f . Sinister and similar: RWD only, light. very low CG, rigid, neutral handling with adjustment
 |
Soon to be added:
Electronics
Distribution
Lots of more Ni-Mh Technique.
Works Cited:
The 1/28 "Drift Bible" by Color0
Tutorial: Setting Camber/Caster on an Xmod by Color0
The Center of Gravity by XMDrifter

 04-12-2009, 09:55 PM


 Linear Mode

