
|
|
|
#1
 01-24-2008, 08:13 PM
|
||||
|
||||
|
This tutorial is pretty difficult. I’d rate it a 8.5 from 1-10.
This will show you how to transform your XMod into a high-torque, rock crawling machine. First, gather all of the required materials. XMod truck chassis, Hitec Hs-55 Servo or similar, any XMod Evolution motor (we’ll need the contacts off the motor), sheet aluminum, 1/16 drill bit, extra XMod spur gear (two can be found in the Stage 2 Motor upgrade), XMod tool kit – the screwdrivers and the large hand drill, small file, craft knife, wire cutters, wire strippers, scissors, solder, and soldering iron. 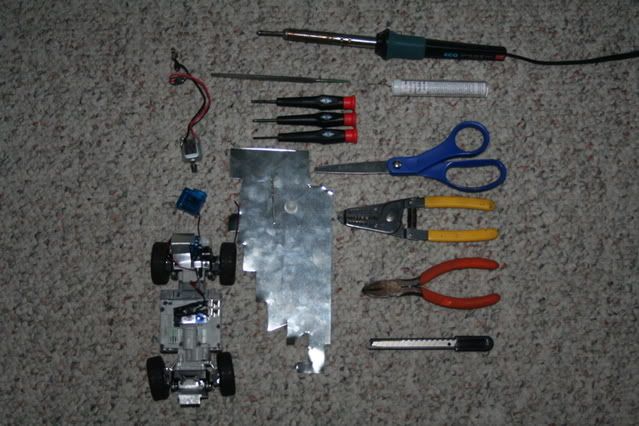 Now, get out your servo. We need to get at the insides to modify it a little bit. On the HS-55, there are four screws. Simply unscrew them, and carefully pull off the end. Be sure to keep the top part of the servo on, there are many small parts that can be lost. 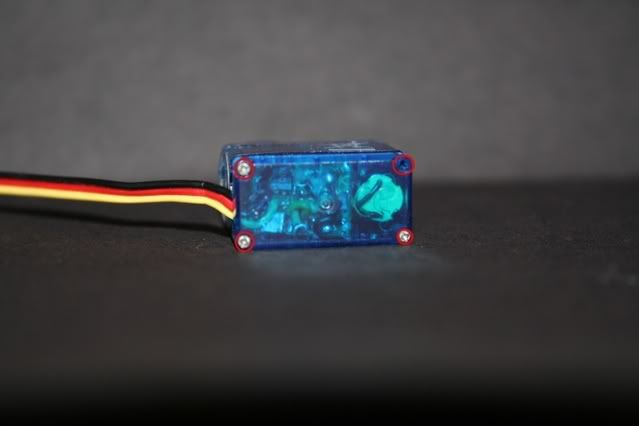 Sorry, in this picture, one screw is missing. Here is what we should be seeing. Keep in mind that all of these wires will be connected; I am writing this after I have already done the tutorial. 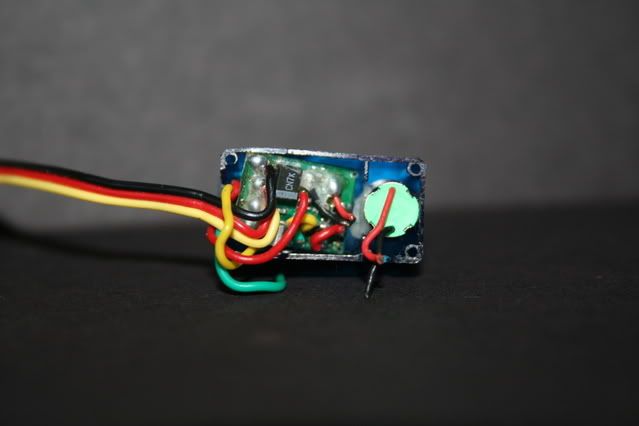 Cut the board out. To do this, cut the potentiometer wires and the wires of the motor itself. Try to cut the motor wires as far to the board as possible. This will help make things easier later on. The potentiometer wires are not used in this setup, so don’t worry about cutting them too carefully. 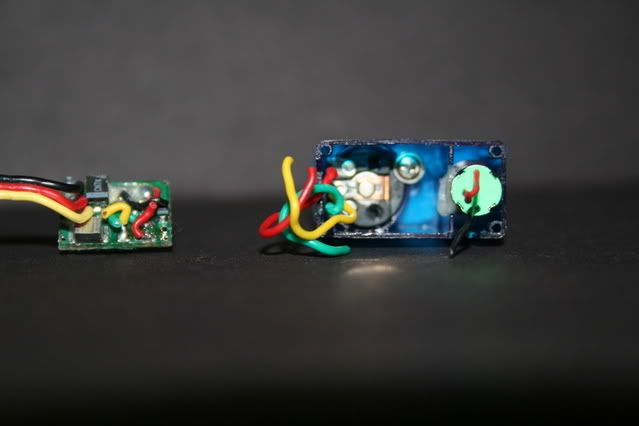 We will not move on to the top. Here is the top part of the servo still on the main servo assembly. 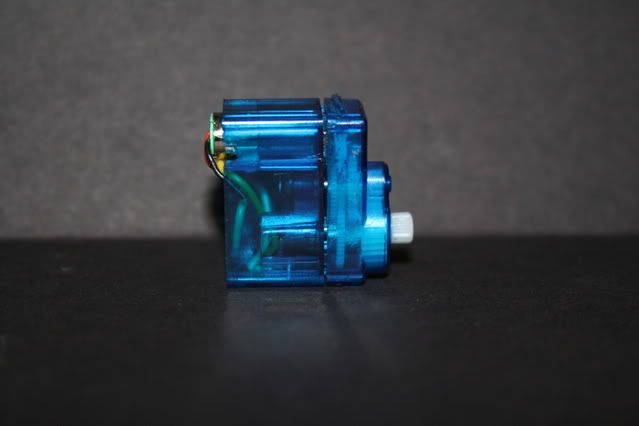 Carefully remove the top cover. Inside are many small gears. Here is what you should see. 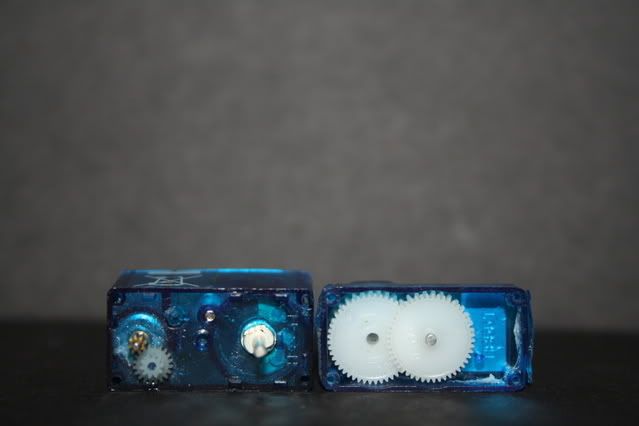 Remove all of the gears and the axle in from the top cover. Keep these in a safe place. 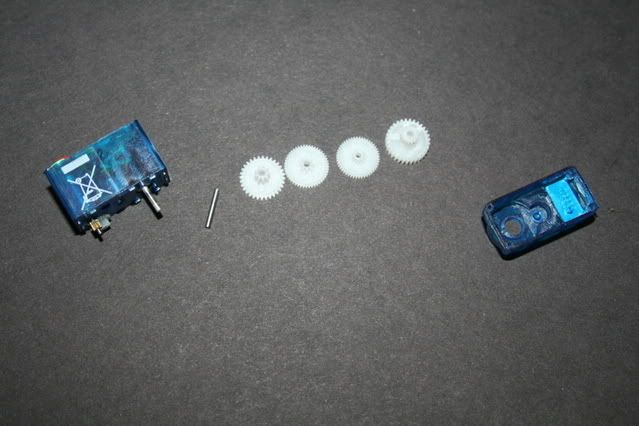 Get the top cover and a craft knife. There is a little tab that prevents the gears from turning infinitely. Cut this tab off with the knife. Be sure to cut flush with the cover, this will ensure that there is no binding. 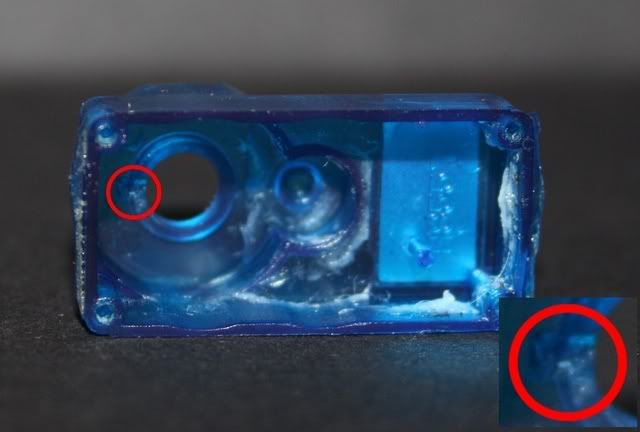 Find the topmost gear. This will be slightly modified. 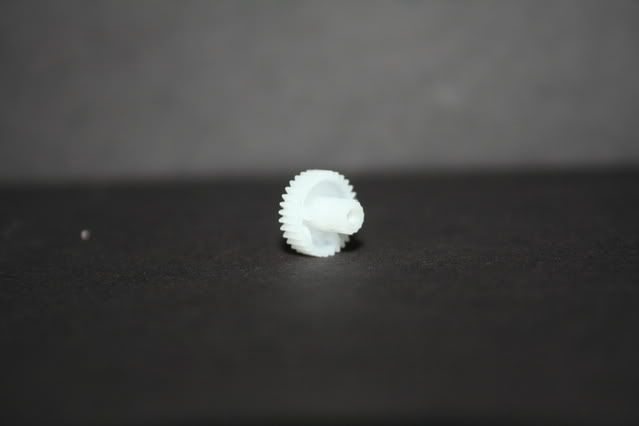 On the back of the gear, there is a notch in the gear that fits on the potentiometer shaft. Using the 1/16 drill bit, drill it out. You don’t have to drill the whole way though the gear, just enough to get rid of the notch. 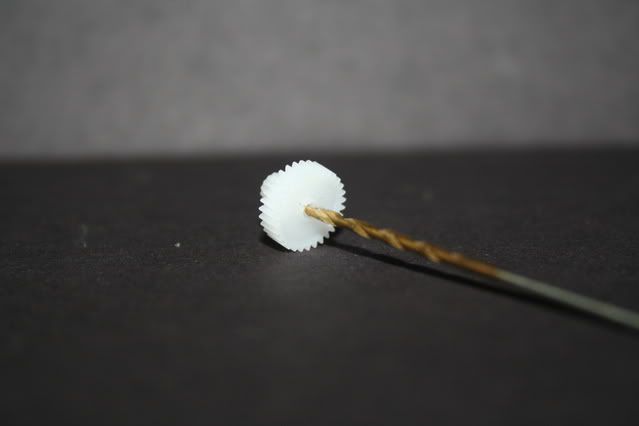 The servo is ready to be reassembled. Put the small axle back in the main servo assembly, and start placing the gears into the correct positions. Assemble the gears in the order detonated by this picture. 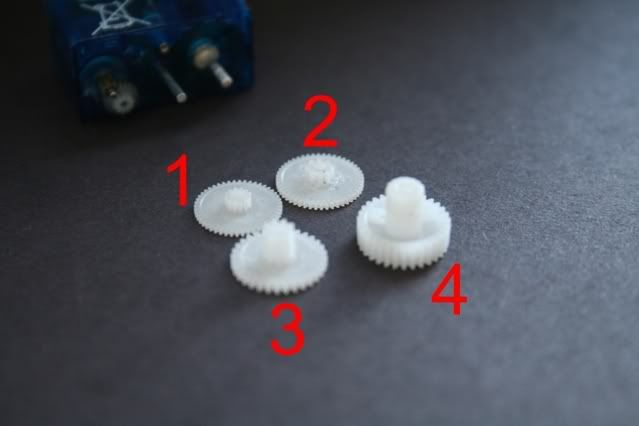 The following pictures show each gear placed on the servo assembly. EDIT!!! Thanks to Texan - Make sure the servo resembles this pic: 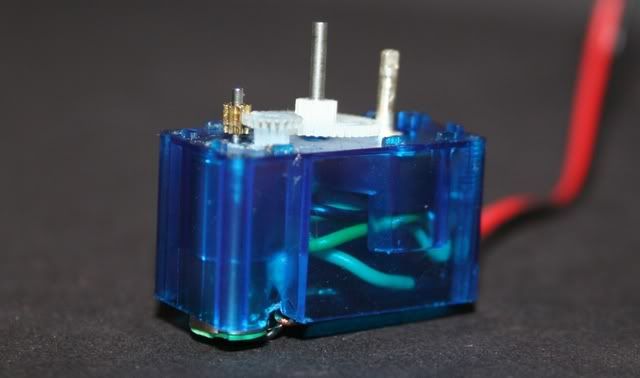 Ignore the setup in the pictures below, I was mistaken on how to do it correctly.  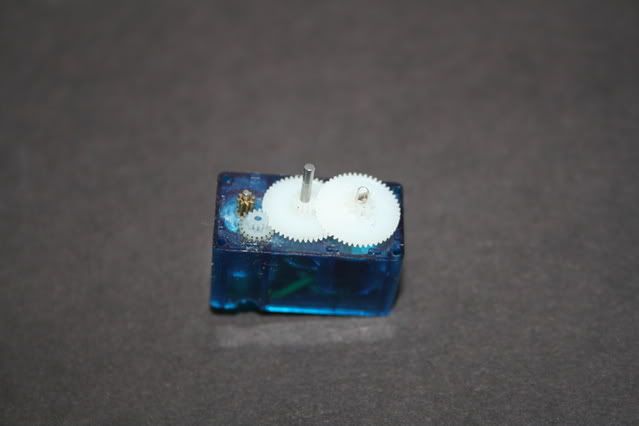 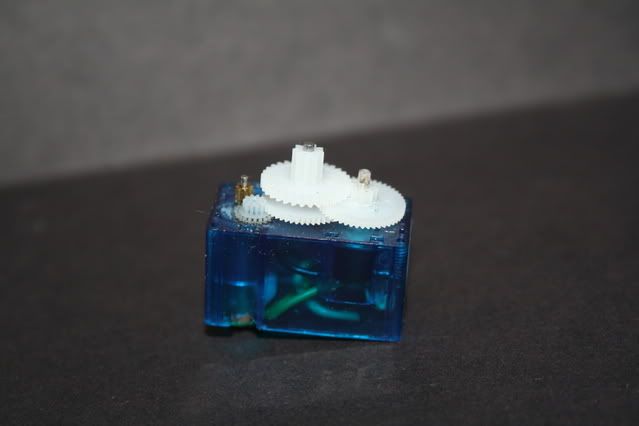 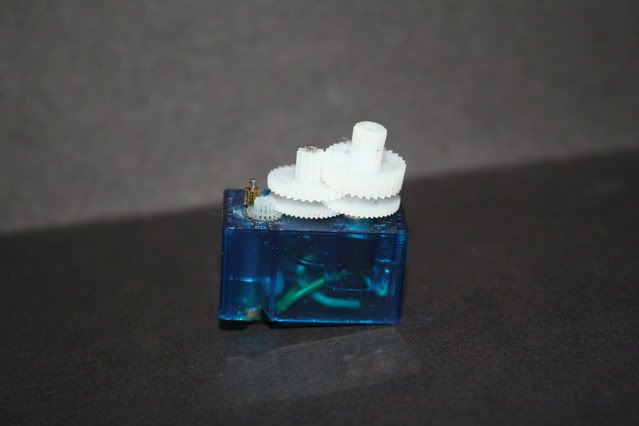 Now, place the top cover back on the main servo assembly. Get the servo motor wires ready. Find some extra wire, or use the wire that was originally used with the servo. 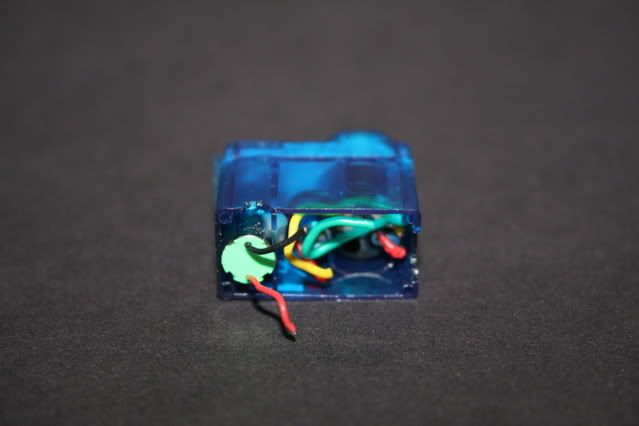 Strip the motor wires and the extra wire you are using. Solder the extra wire to the motor wire. 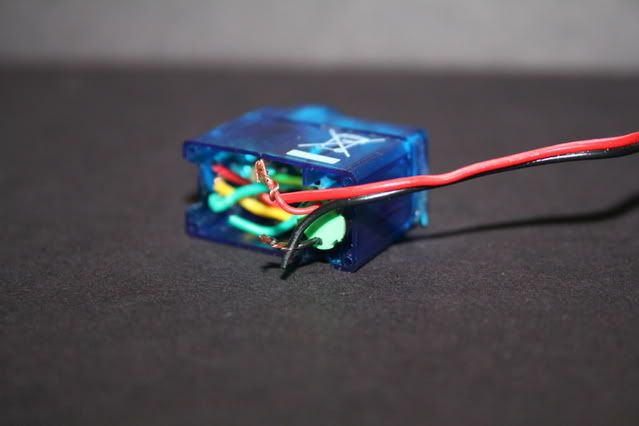 Solder the motor contacts to the extra wire. 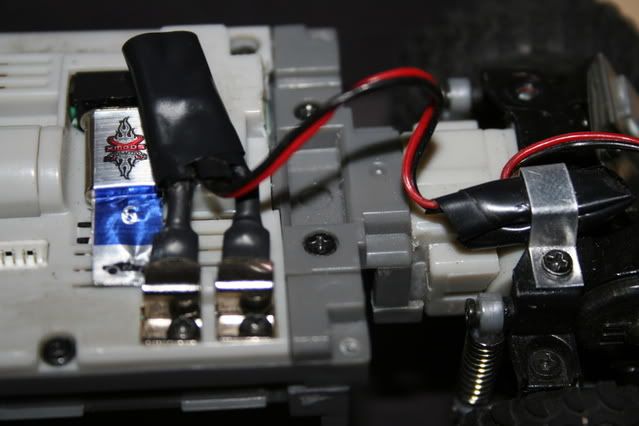 Cut a small notch in the servo for the wires to go though. This one is a little oversized. 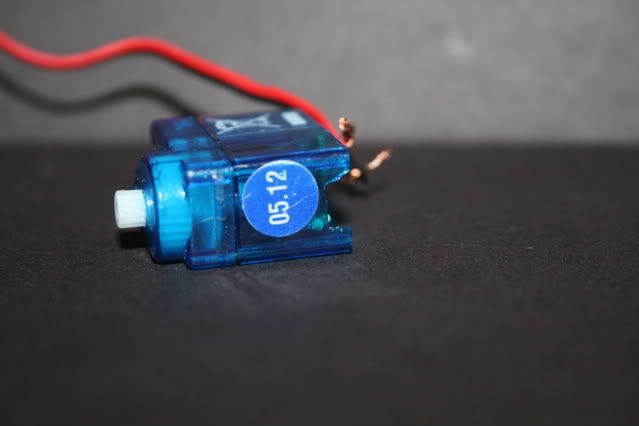 Put the bottom cover on, and replace the screws. DO NOT OVERTIGHTEN THE SCREWS. This can lead to binding. 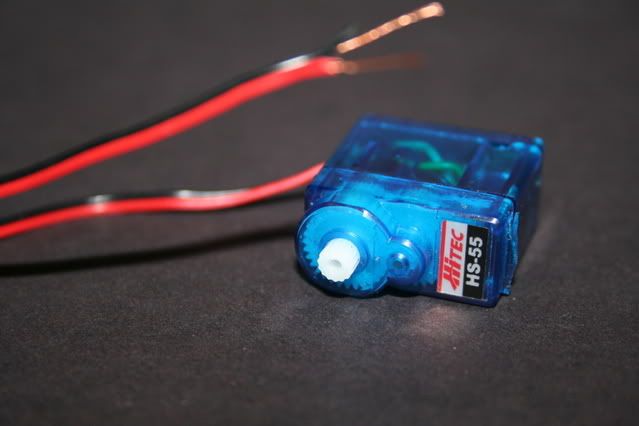 Get the extra spur gear and the large hand drill. Drill out the spur gear like so. (A before and after picture) 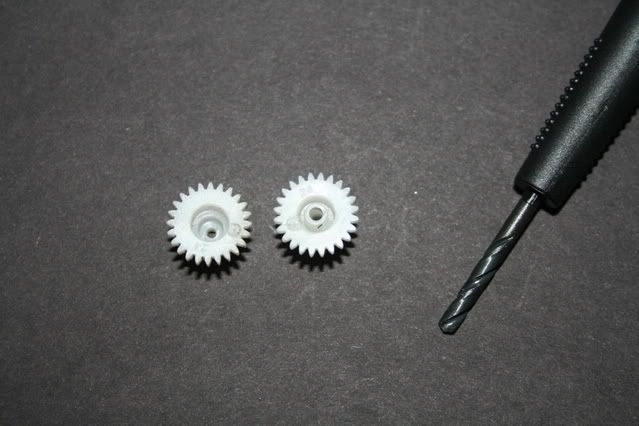 Screw the spur gear onto the servo using a long Evolution XMod screw. Make sure to screw it on snugly, this is often a failure point. Sometimes, the servo has so much torque that it begins to unscrew the gear.  Now, the servo is ready to be installed into the truck. 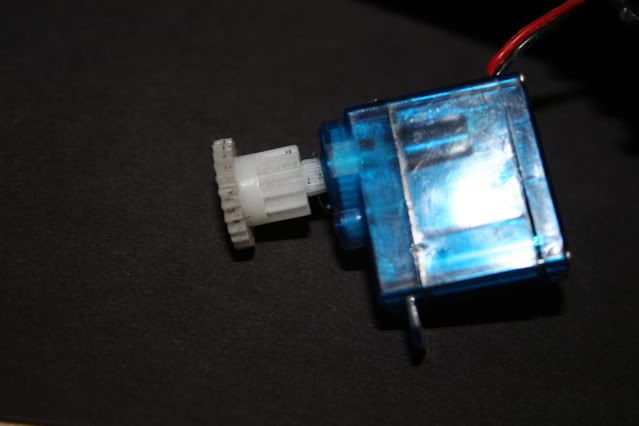 The motor cradle needs to be cut for the servo to fit in. Here are before and after pictures of the cutting. 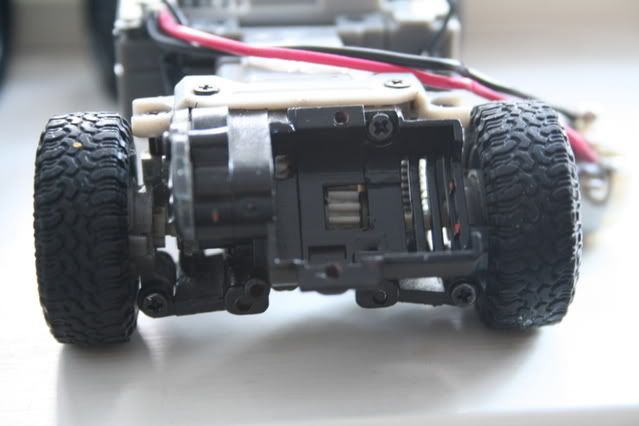 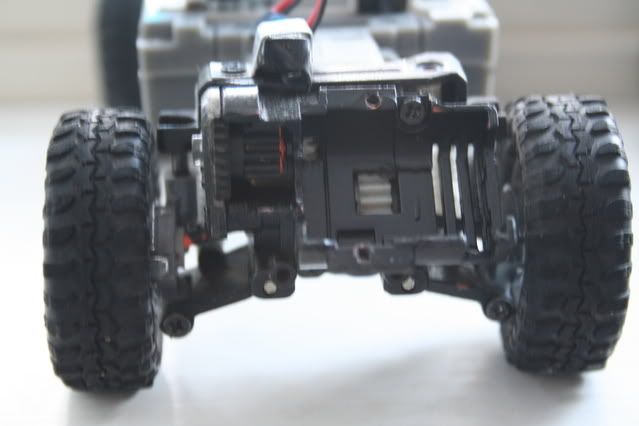 Using the aluminum, make some shims for the servo to rest on. Also make a band to hold the servo in place. Use the bottom motor screw hole and the right rear arm hole to secure the strap. 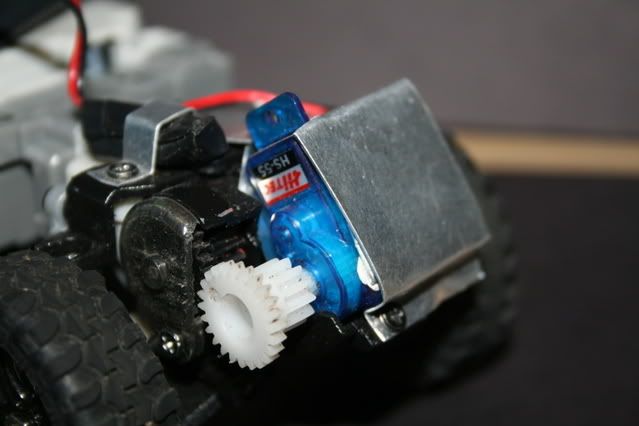 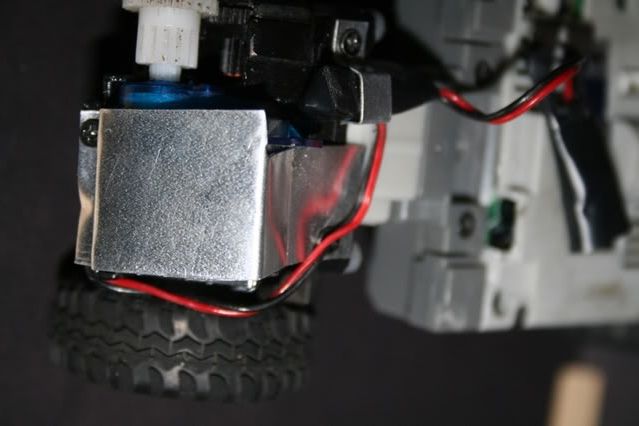 Now, screw the contacts on to the positions, and your truck is ready to crawl! For optimizing trail performance, I recommend installing: -Lift kit -4 wheel drive -Locked differentials -Bigger tires And, that’s it! Congratulations on installing a servo in your truck. -Lancer_Man
__________________
 I will not be able to visit these forums very much anymore. If you need to contact me, please e-mail me at [email protected]. I will finish up all bodies I have and get them shipped to each of their owners. Thank you. Last edited by Lancer_Man; 02-02-2008 at 10:42 PM.. Reason: Just Because!! |
| Currently Active Users Viewing This Thread: 1 (0 members and 1 guests) | |
|
|


 Threaded Mode